Giấc
Experimental project
Mixed media
Mixed media
Date: 10/2022-?
Status: Ongoing
Status: Ongoing
About
Sleep is such an essential pattern of life since it is so apparent. Yet, few people understand that sleep is a state feature - a space that crosses one's life's midpoints and very plainly reflects self-shape.
Giấc, in dialogue with each being, conceives as a modest exhibition of boxes, the manifestation of those nights of sleep. Here, individuals are able to touch the parallels and variances, the subtleties, and the ambiguity in each unique tale through our boxes.
- Words by Han
See Giấc at: https://giac.cargo.site/ (For the best experience, it is reccommended that you use a PC/laptop)
Personal thoughts
The sleep stories were collected from interviews with people in our lives who were willing to share their experiences with us. It was a once-in-a-lifetime experience, as we rarely have the opportunity to talk about someone else's personal time, especially when it comes to sleep. It was fascinating to see how different people have unique sleep rituals and patterns. We learned that our sleep stories could reveal a lot about our personalities and lives. Knowing about the sleep habits of others was eye-opening, and it made us feel empathy towards them. The maker of each box, as well as the viewers, had different visual interpretations of each sleep story. That's why we decided to work on one box independently. Within the time frame of the program, we were only able to make one box each, so there were only four boxes representing four stories at the time of presentation. However, the project did not stop there.Through Giấc, we hope to bring attention to the beauty and uniqueness of each person's sleep story, and to spark conversations about the importance of self-care and sleep hygiene.
Because the output of Giấc was physical, it provided an ideal playground for me to test different mediums. Visualizing abstract experiences, such as sleep rituals, was challenging, but through the process, I had fun learning about materials and craft techniques. Without a doubt, this project is a great opportunity, and I will continue to experiment with more boxes.
︎︎︎ On the making of Kén(cocoon)
(I recommend reading the story of Kén before you read the process)


I started with digital sketches of the box. Relating to the sleep story, Kén would have 3 layers of box inside one another and it would open to both sides. In the innermost layer, there would be a sphere.
The main material of each component differed, which explained each timeline in the girl’s life mentioned in the story.
The main material of each component differed, which explained each timeline in the girl’s life mentioned in the story.
- The outermost layer - 1st box: acrylic glass
- The 2nd box: fabric
- The 3rd box: bamboo
- The sphere: resin
Phase 1: Preparation of each component:
Acrylic box


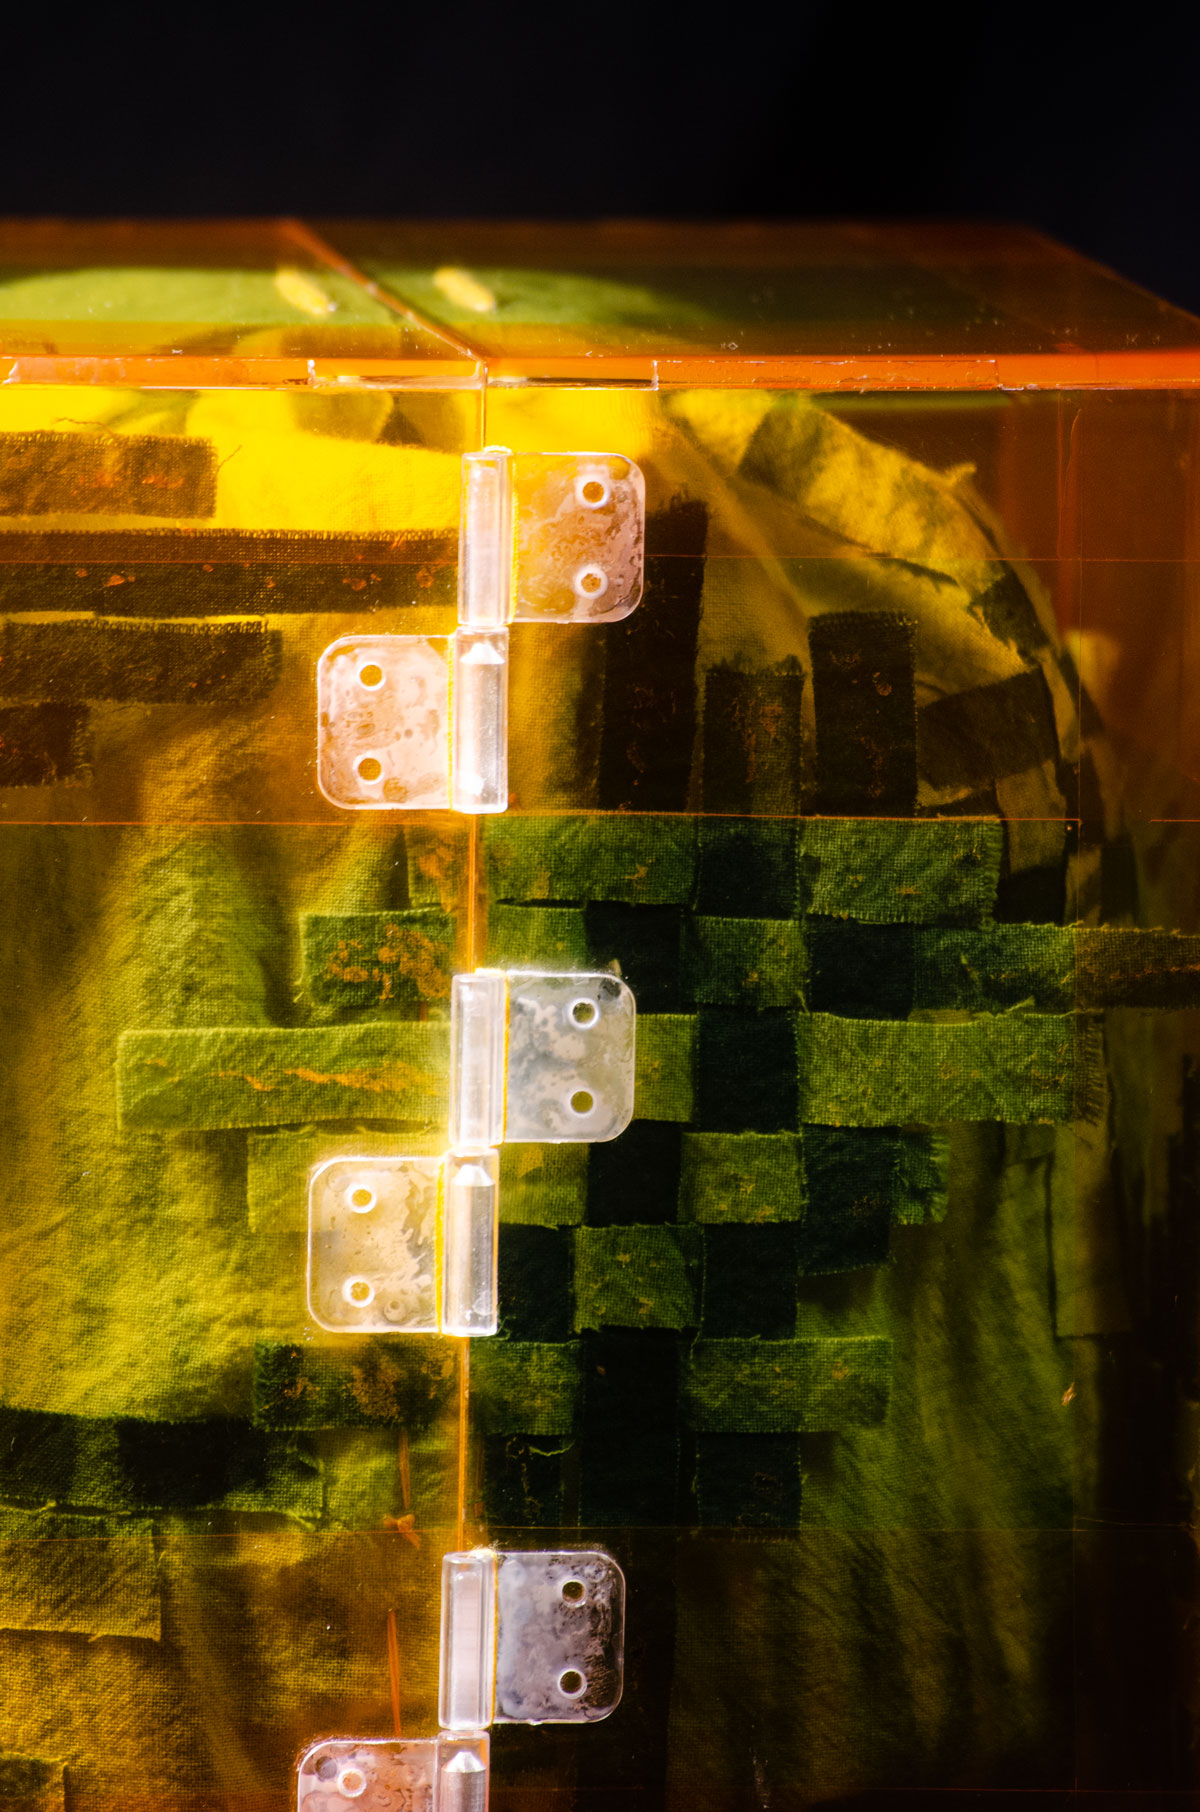
The acrylic box represents the present time, specifically her apartment in Saigon. To create the structure of the box, I designed the dieline on my computer and then had it laser-cut on a 3mm acrylic sheet (fig 1.1). I wanted the pieces to have a rigid bond, so I made those zigzag joints and later attached them with super glue (although I regretted using it). I tested whether I had the zigzag joints correct, and they fit perfectly (fig 1.2). I wanted to add a yellow overlay color over the box to replicate the sleeping lamp during her sleep. At first, I thought of buying transparent colored acrylic sheets, but they were a lot more expensive than the clear ones, so I searched for an alternative solution. Car light cover stickers turned out to be the problem solver. I cut the stickers to the size of each piece and then stuck them to the inner face of the box. I added layers of orange stickers over the yellow one to mock the light spread (the closer to the center of the light, the brighter) (fig 1.3-1.5, 1.7-1.8). For better handling, I then glued the box together while still having the protective sheet and sanded down the sharp edges (fig 1.6). 2 sides of the box were connected using 3 removable clear plastic hinges (fig 1.7-1.8).
Fabric box


The fabric box represents her childhood sleeping in hammocks. When I thought of it, I became interested in the knots at two ends creating sharp marks on the fabric (fig 2.1). I wanted to recreate the look of those marks on the 2nd box. I found out about a Japanese fabric dyeing technique called Shibori, which uses ties and knots to create patterns on dyed fabric. There are many techniques of Shibori, but I only focused on doing arashi and itajime, the ones that create the pattern I wanted. I used raw cotton fabric that I already had at home (fig 2.2), cut it into various-sized pieces (fig 2.3), and used rubber bands, a mop stick, a vacuum cleaner extension tube (to save money), and wood plates/sticks to tie the fabric (fig 2.4). For the dyeing chemical, I used the Jacquard indigo tie-dye kit. The result came out really nice to me, although there were several issues like I hadn't prepared the fabric well, and the dye couldn't seep through some of the inner layers (fig 2.6).
Bamboo box


The bamboo box represents the time when she was a newborn, sleeping in her family crib (fig 3.1). Luckily, I had this bamboo gift box at my house (fig 3.2). It had been used to store last year's Tet gifts, and my mom had kept the box for other storage reasons. The box had a body and a separate lid, but the body was more than enough. I needed to fit the bamboo structure into the fabric box while resembling the weaving pattern of the crib, so I decided to reconstruct it. I carefully took it apart (fig 3.3) and then gently scrubbed and rinsed the pieces to get rid of adhesive residue. I let them dry overnight on my balcony, avoiding the sun because it would make the bamboo too dry and brittle (fig 3.4).
With the pieces dried, I tore the thick pieces in half to have the same width as the thin ones, so the pieces would be even like in the reference. Then, I started reweaving it. It was difficult at first because the pieces were not stretched out; they still deformed according to the shape of the gift box, but it got easier as I got used to it (fig 3.5-3.6). To figure out a way to fit the structure into the box, I wove them into a big flat square piece and then tried bending it to see how I could deal with it. As you can see in fig 3.7, I ended up bending the vertical pieces and weaving them together, which took quite an effort. This was only one side (left); I also had to bend the other side (right).
With the pieces dried, I tore the thick pieces in half to have the same width as the thin ones, so the pieces would be even like in the reference. Then, I started reweaving it. It was difficult at first because the pieces were not stretched out; they still deformed according to the shape of the gift box, but it got easier as I got used to it (fig 3.5-3.6). To figure out a way to fit the structure into the box, I wove them into a big flat square piece and then tried bending it to see how I could deal with it. As you can see in fig 3.7, I ended up bending the vertical pieces and weaving them together, which took quite an effort. This was only one side (left); I also had to bend the other side (right).
Resin sphere


The meaning of the resin sphere might be the hardest to guess. When I decided to make Kén, in my early sketches, I planned to put a porcelain doll in the innermost box to represent herself, the owner of the sleep. The whole concept at that time was something like a Matryoshka, because there were boxes inside boxes. But after two days of searching for the best doll, I couldn't find one. That's why I decided to do something else. An idea about the sphere came to me; I remembered she once told me that she was a premature baby when her mother had an accident and had to give birth to her. Luckily, she was put in a NICU, which looked like a glass sterile chamber, for special care. I imagined her sleeping in the unit like a raw gem, waiting to shine and break out of the cocoon someday. That's why I thought of metamorphosis, accounting for the Monarch - King of butterfly wing’s pattern (fig 4.7).
I made two spheres, a yellow one (fig 4.4) inside a clear transparent one (fig 4.6). For cost-saving purposes, I purchased two highlighters to mix the color of the wing for the small sphere (because they didn't have the exact color I wanted), and added yellow glitters to the mix (fig 4.1-4.2). However, when it cured in the mold, it changed to greenish yellow (fig 4.4). I decided to move forward with it because the due date was near, and I didn't want to wait another day for it to cure. The bigger sphere was more complex. For the pattern to appear inside the sphere and not outside, I tried out the technique of painting on multiple layers of resin, like in this 3D Koi fish painting. However, the size of the sphere was big, and pouring multiple layers of resin would result in a very long curing time. To be safe, I decided to do three layers of the pattern. After I poured 1/3 of the mold, I waited for a day and drew the pattern on the resin surface with acrylic paint (fig 4.5). Then I put the small sphere in the middle and poured resin over to 1/2 of the mold. I repeated the process until finished (fig 4.6). The sphere seemed to discolor when I left it under the sunlight for a few days. I also sanded and polished the two spheres by hand.
I made two spheres, a yellow one (fig 4.4) inside a clear transparent one (fig 4.6). For cost-saving purposes, I purchased two highlighters to mix the color of the wing for the small sphere (because they didn't have the exact color I wanted), and added yellow glitters to the mix (fig 4.1-4.2). However, when it cured in the mold, it changed to greenish yellow (fig 4.4). I decided to move forward with it because the due date was near, and I didn't want to wait another day for it to cure. The bigger sphere was more complex. For the pattern to appear inside the sphere and not outside, I tried out the technique of painting on multiple layers of resin, like in this 3D Koi fish painting. However, the size of the sphere was big, and pouring multiple layers of resin would result in a very long curing time. To be safe, I decided to do three layers of the pattern. After I poured 1/3 of the mold, I waited for a day and drew the pattern on the resin surface with acrylic paint (fig 4.5). Then I put the small sphere in the middle and poured resin over to 1/2 of the mold. I repeated the process until finished (fig 4.6). The sphere seemed to discolor when I left it under the sunlight for a few days. I also sanded and polished the two spheres by hand.
Phase 2: Assemblage of all the components


Phase 3: Shooting


Again, for cost-saving purposes, we didn't hire a studio, but we took the photos ourselves with anything that could support us. I tried two backgrounds, a white and a black one. I created a fake studio softbox by covering shipping foam sheets over a lamp and a desk lights...
Results
My edited stopmotion clips


Here are some still shots that are not on the official site
I will also mention some flaws that I removed in the official site's shots.
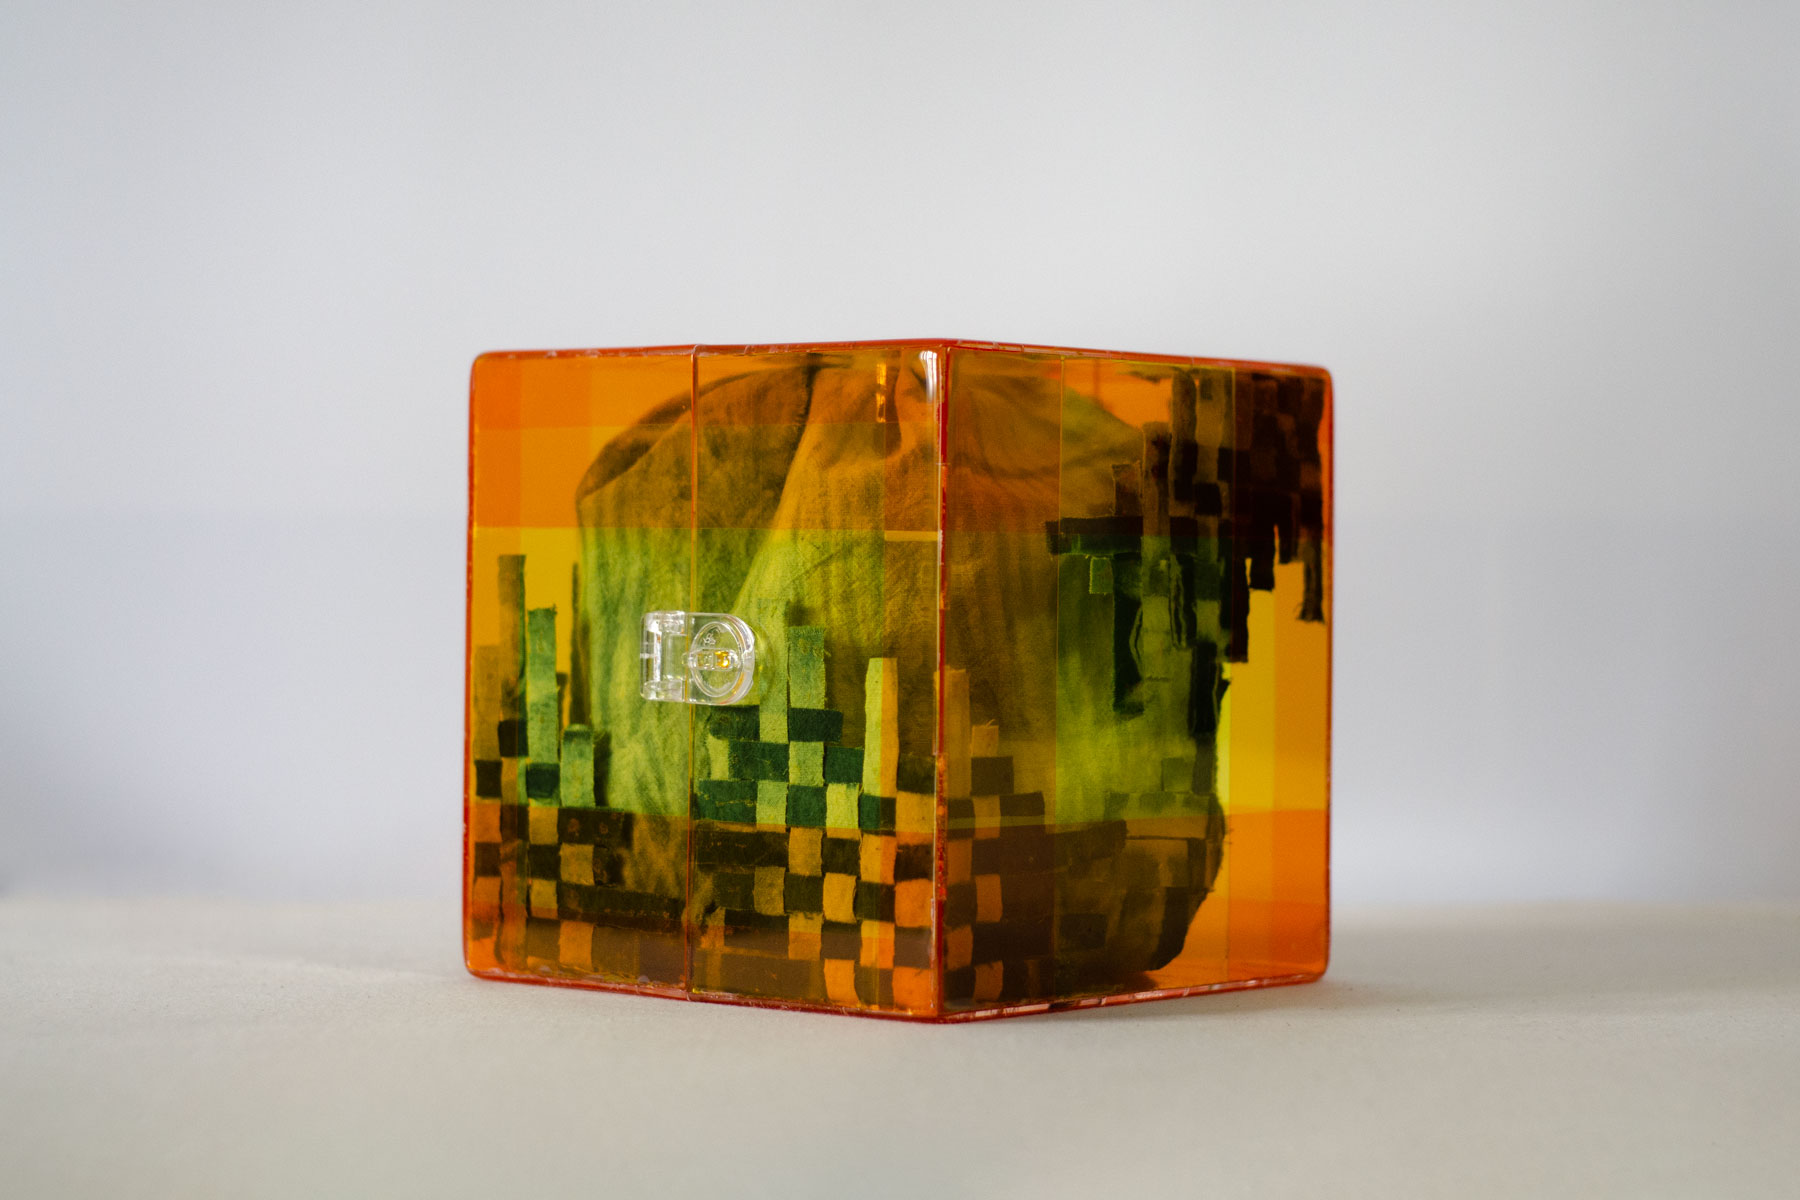

If you notice, you can see white spots on the edges of the acrylic box due to the use of super glue. When the super glue hardened, it emitted smoke and formed white residue where the contact wasn’t tight enough. I should have used UV glue instead.
Additional element (2): The lock was used to resemble her apartment door. Anh Minh suggested that a metal version of the door lock would be better, and I agree.


The bamboo box was cut in a round shape to fit in the remaining space. To keep the bamboo box in the middle when opening the box and for it to handle the heavy sphere, I stitched it to the back hinges of the acrylic box, as you see can below.
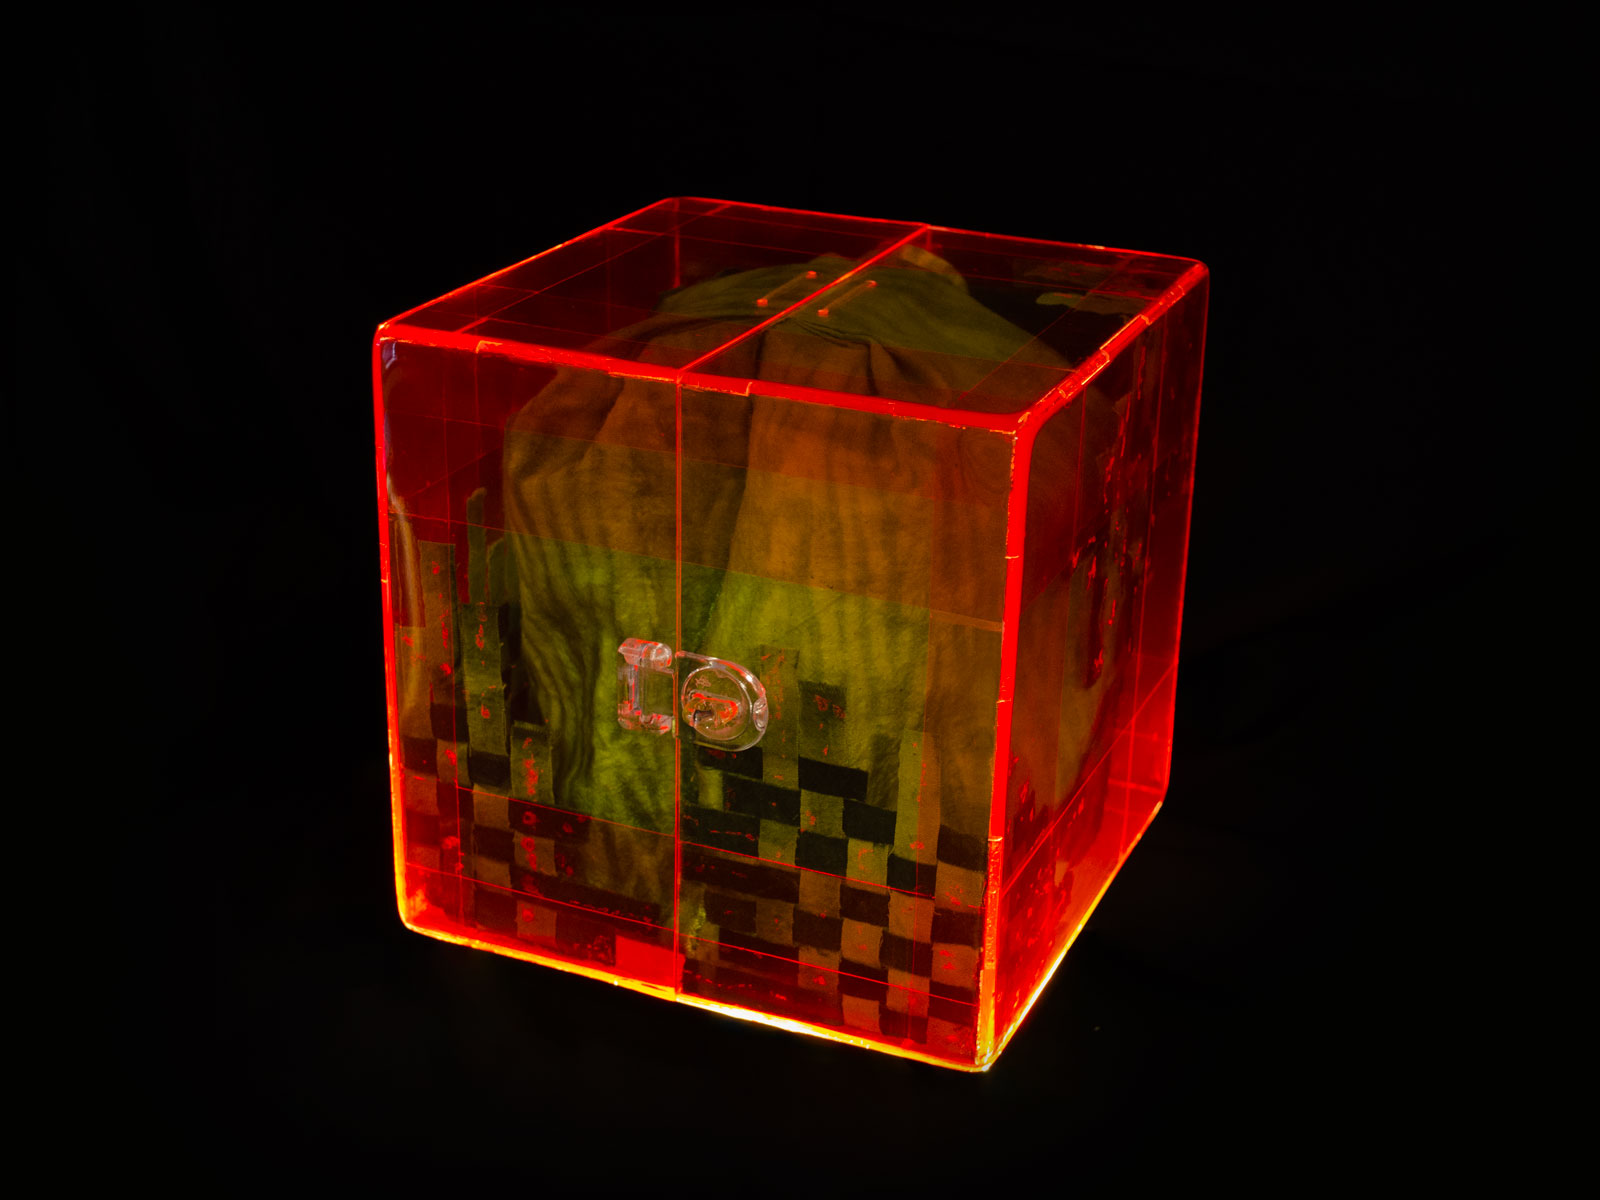
This is what happend when I put Kén on a LED yellow-light base.